
Get Started with Zoom
Read moreHow to Transition from a Regular to a Virtual Course
Read MoreHelpful Tips for Teaching with Zoom
Read moreChoose the Right Technology
Read moreUsing Rocketbook Beacons During a Lecture
Read moreHow to get started with Zoom
Step 1:
For Windows users, please download the Zoom Client here.
For MAC users, please download the Zoom Client here.
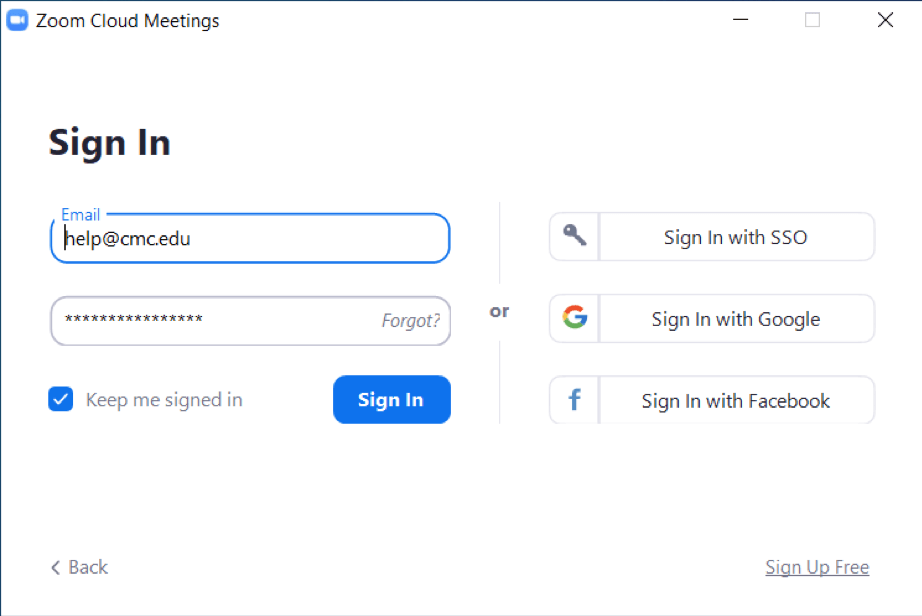
Once installed, you’ll get a prompt to sign in with your Zoom account. Sign in using your @cmc.edu e-mail address and the password you had created when you activated your Zoom Account.
Step 2:
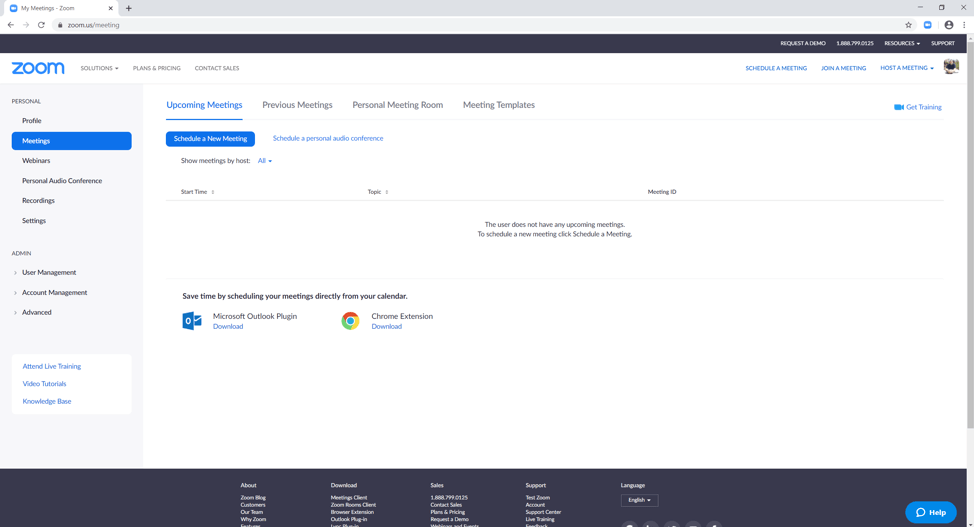
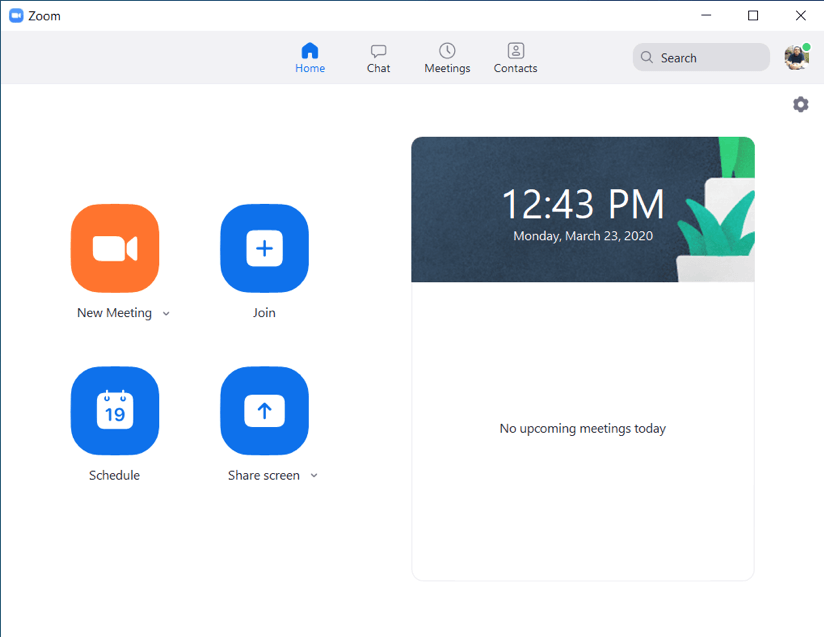
You’ll reach a general page when signed in where you can setup a meeting or schedule a meeting. The quickest way to get started here is to make a New Meeting by clicking on the “New Meeting” button.
Step 3:
This will open up a Zoom Meeting and will prompt you to connect with your camera and/or speaker or headphone device. Once connected, you can then start inviting your class. Click on the “i” icon on the top left to reveal an overlay with meeting info. Then click on “Copy URL” to copy the link to the Zoom Meeting.
Step 4:
You can then distribute this link by e-mail or through Sakai’s Announcement feature.
For E-Mail: Sign into the CMC Portal and access your class list page. Use the Portal to send an e-mail to all students, then in the body of the message hit “CTRL+V” on a PC or “Command+V” on a Mac to paste the Zoom Meeting link and send the e-mail out.
Step 5:
For Sakai: Sign into Sakai and on your course-site go ahead and create a new Announcement. Paste the Zoom Meeting Link in the body, then set the e-mail notification to all participants in your class so everyone in your class will get the Zoom meeting link by e-mail.
Step 6:
Once students have your meeting invitation, they can join via the meeting URL on their computers. Alternatively, they can also join via the meeting ID on their mobile devices. Once in the meeting they will appear in the participant’s panel.
Other Resources
For more tutorials on how to use Zoom, here is their official resource on the Zoom website.
There are a substantial number of guides that will teach you the mechanics of using Zoom for video conferencing, web conferencing, and webinars. One helpful resource is Zoom’s Help Center that includes an in-depth guide and a collection of one minute video introductions. Zoom also hosts free and interactive live training webinars daily.
How do I transition from a regular course to a virtual one?
Here are some general tips as you start thinking about the transition to virtual teaching:
- Communicate with your students right away: Even if you don't yet have a plan in place, communicate with your students as soon as possible, informing them that changes are coming. Let them know how you will be communicating with them about class, and what your expectations are for checking email or Sakai, so you can get them more details when available. Consider suggesting that they create an email folder for course messages from you.
- Consider realistic goals for teaching from anywhere: As you think about continuing instruction online, consider what you think you can realistically accomplish. Do you think you can maintain your original syllabus and schedule? Are there ways that students can keep up with the reading with some assignments to add structure and accountability? How will you keep them engaged with the course content? How will they keep themselves engaged with the course content?
- Review your course schedule to determine priorities: Reflect on your learning goals for class and identify your priorities during the disruption — providing lectures, structuring new opportunities for discussion or group work, collecting assignments, etc. What activities are better rescheduled or revised, and what can or must be done online? Give yourself flexibility in that schedule, just in case the situation takes longer to resolve than initially planned.
- Review your syllabus for points that must change: Identify what must temporarily change in your syllabus, such as policies, due dates, or assignments, and communicate those changes to students. Ensure any change you make aligns with CMC policies set forth by the Registrar’s Office.
- Pick tools and approaches familiar to you and your students: Try to rely on tools and workflows that are familiar to you and your students, introducing new tools only when absolutely necessary.
- Reset expectations for students: You will have to reconsider some of your expectations for students, including participation, communication, and deadlines. As you think through those changes, keep in mind the impact this situation may have on students' ability to meet those expectations, including illness, lacking power or internet connections, their presence in different time zones, or needing to care for family members. Be ready to handle requests for extensions or accommodations equitably.
- Create a communications plan: Once you have details about changes in the class, communicate them clearly to students, along with how and when they can contact you (email, online office hours, etc.). Anticipating students will have questions, let them know how and when they can expect to receive a reply from you.
- Schedule periods for verbal communication: Our students are used to verbal interactions with faculty. Going entirely to written online formats for class interactions may cause additional stress. Most students will appreciate times to check in and talk with you, in addition to any written communications. You can do this by phone, zoom, etc.
Two good resources:
Interesting Chronicle article about Going Online in a Hurry
Very interesting Stanford document on Teaching Effectively during Times of Disruption (they use Zoom too)
Do you have some helpful tips for using Zoom to teach?
Glad you asked. Yes, we do!
Practice
Before you use Zoom to teach, take some time to practice. Because Zoom runs on multiple devices – including mobile phones – one great way to practice is to launch a Zoom meeting on your computer and then sign into that meeting on your iPhone, iPad, or Android Device. Leave the audio off in order to avoid getting feedback.
You may also want to practice with your students by scheduling a low-stakes, introductory class meeting in Zoom with the sole purpose of having all of your students log in and troubleshoot the four most common technical issues: students unable to see or be seen, students unable to hear, students who cannot be heard, or students’ microphones picking up background noise or causing an echo.
Teach Your Students How to Use Zoom as Students
Chances are most of your students have used video chat software like Facetime, Google Duo, WhatsApp Hangouts, or Skype to communicate with friends and loved ones. That’s different than using web conferencing for scholarly purposes. Do not assume that your students know how to use or learn in Zoom. You will have to teach them.
In particular:
- Remind your students to download and install the Zoom app on their devices well in advance of the first class meeting.
- Give your students a tour of the Zoom interface during your first class session and teach them how to mute and unmute themselves. Remember: This may be the first time your students have ever used Zoom.
- Determine if you are going to require your students to have their web cameras on during your entire class or if you are going to allow them to turn them off and set that as a class rule during your first Zoom meeting.
- Remind your students about the importance of being mindful about what is happening behind them when their web cameras are on, particularly when it comes to roommates and loved ones who may unknowingly be in the background.
- Show students how you want them to get your attention. In small classes, some professors ask students to raise their hands on their web cameras. Others ask students to unmute themselves and simply chime in. In larger classes, you may want to consider using Zoom’s built-in nonverbal feedback buttons. These buttons are disabled by default, but we’ll show you how to turn them on in the Review Zoom’s Hidden Settings section below.
- Set some ground rules on how you want your students to use the Chat box. Private chat is locked off.
- Show your students how to use the Alt + Tab keys on their Windows laptops or the Command + Tab keys on their Mac laptops to switch back and forth between Zoom and whatever program they use to take notes.
Use Zoom’s Mute Function
One of the frequent pitfalls of video conferences is that at least one remote user will accidentally leave his or her microphone on, drowning out the class’ conversation with background noise. Knowing how to use Zoom’s mute function will help you wrestle back control.
Engage in Conservations and Active Learning with Your Students
It is easy to give a PowerPoint lecture in Zoom. It is also relatively easy to use Zoom to have your students engage in a classroom debate, analyze a real-life case, participate in a think-pair-share activity, collaborate on group work, play games and simulations, take a virtual field trip, give student or group presentations, and much more. Mix it up.
Change Your Course
It is unlikely for most of you that you can transplant what you do in the class or in the office to a virtual format with no change at all. You will need to reflect on how to change what you do in function of the new medium. You will all have a large degree of latitude to adapt your teaching and your work. We will trust you to make changes in what you teach, how you teach it, how you assess students’ performance, in function of your own educational goals and constraints. Don't be afraid to experiment. Involve your students: that they may have good ideas, and they are as worried as you are, so communication with them is essential.
Use Breakout Rooms
Zoom allows you to split your students into separate breakout rooms for small group projects and discussions, but this feature is disabled by default. To enable it, go to the Zoom profile settings and turn Breakout Room on in the In Meeting (Advanced) section. You only need to do this once.
Once you have enabled breakout rooms in your Zoom account, you can either pre-assign students to breakout rooms before class begins or manually create breakout rooms and assign students to them during class. Zoom’s Managing Video Breakout Rooms guide will show you how to create breakout rooms, assign students to rooms, manage breakout rooms, broadcast a message to your breakout rooms, and end a breakout room session.
Poll Your Students
One of the best ways to get immediate student feedback is to poll your students during class. Zoom also has a built-in polling tool, but it is turned off by default. To enable it, go to the Zoom profile settings and turn on Polling in the In Meeting (Basic) section. You only need to do this once.
One you have enabled polling in your Zoom account, you can add poll questions before class begins or you can manually create poll questions during class. You can only create a maximum of 25 polls for a single meeting.
Use Zoom to Pre-record Lectures
Recording your classes in Zoom is easy to do. We highly recommend you do so, for the following reasons:
- Students in different time zones
- Students encountering technical problems
- Students with accommodations
One challenge is that recordings can take up a lot of storage and each user only has 0.5 GB of cloud storage per licensed account. It is recommended that you download your recordings, remove them from Zoom shortly after and then upload them to Box to share with your students.
Enabling local recording on your Zoom account
Local recording is an excellent option for users who wish to bypass the recording and processing delays sometimes associated with saving directly to Zoom’s cloud storage. It can also make things more convenient for you when considering how you’d like to share those recordings with your students. Please note that local recording times can vary depending on your hardware specifications and configuration.
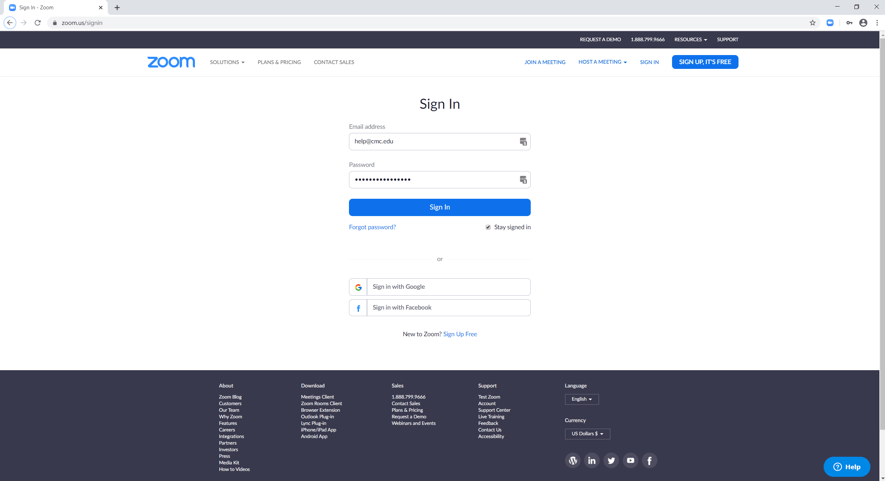
- Open your web browser and navigate to the Zoom account portal at https://zoom.us and click “Sign In” at the top right of the screen.
- Enter your Zoom account information. This is your @cmc.edu email address and the password you set when activating your Zoom account and click “Sign In”.
- Click on the “Settings” tab on the left-hand side of the screen.
- Click on the “Recording” tab at the top of the screen.
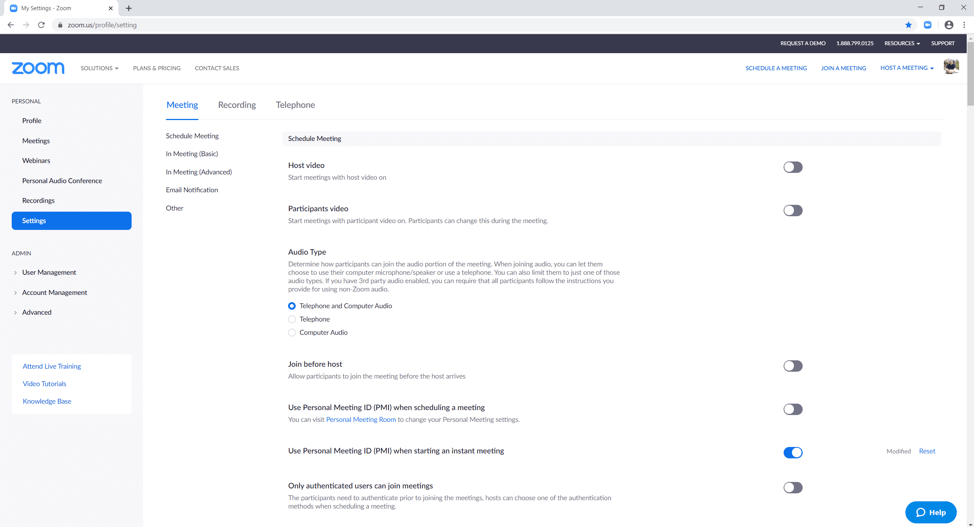
- If “Local Recording” is not on (blue) then click on the slider to right enable it.
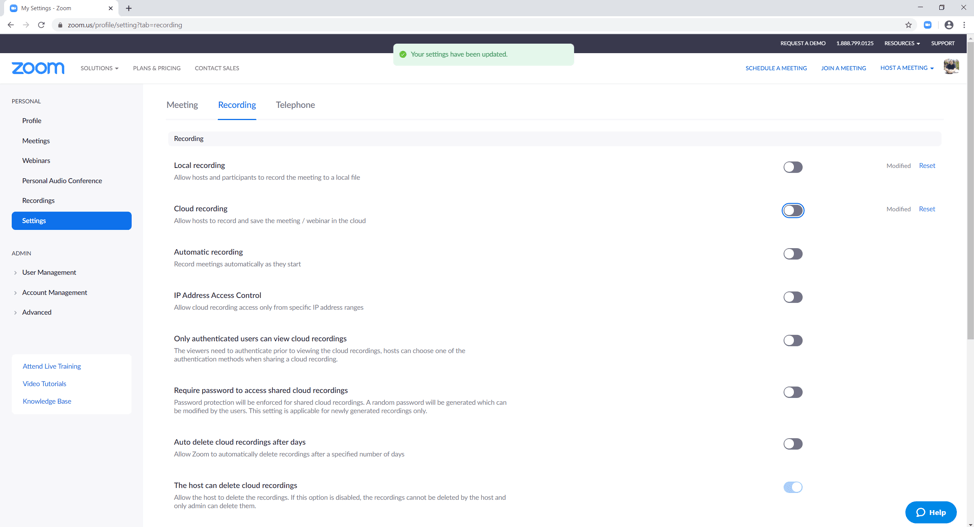
- Once it is enabled it should be blue. Optionally at this point you can also click on “Host can give participants the permission to record locally” if you’d like.
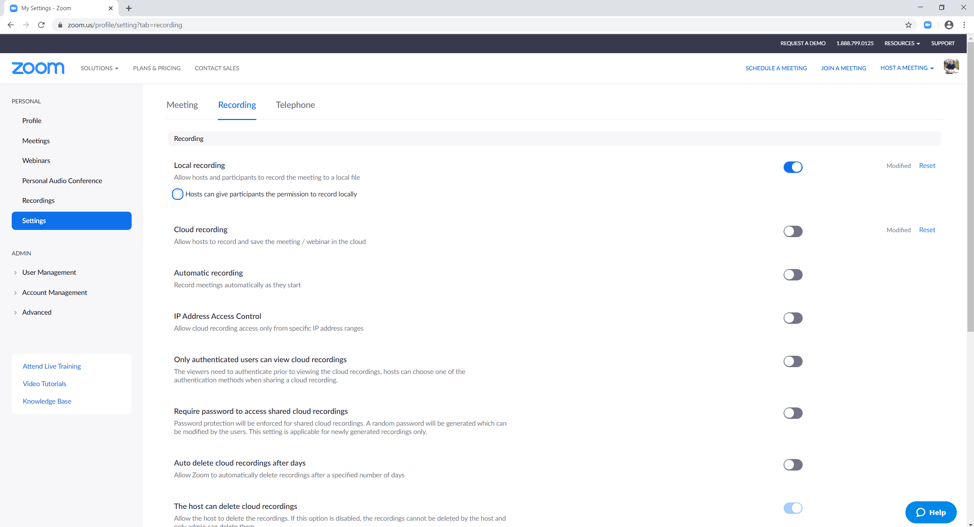
- Local recording is now set on your account and will stay on until switched off.
Configuring and using local recording on your Zoom account on MacOS
- Launch the Zoom desktop client by selecting the search icon in the top right corner of your top bar and looking for Zoom within the search bar that pops up.

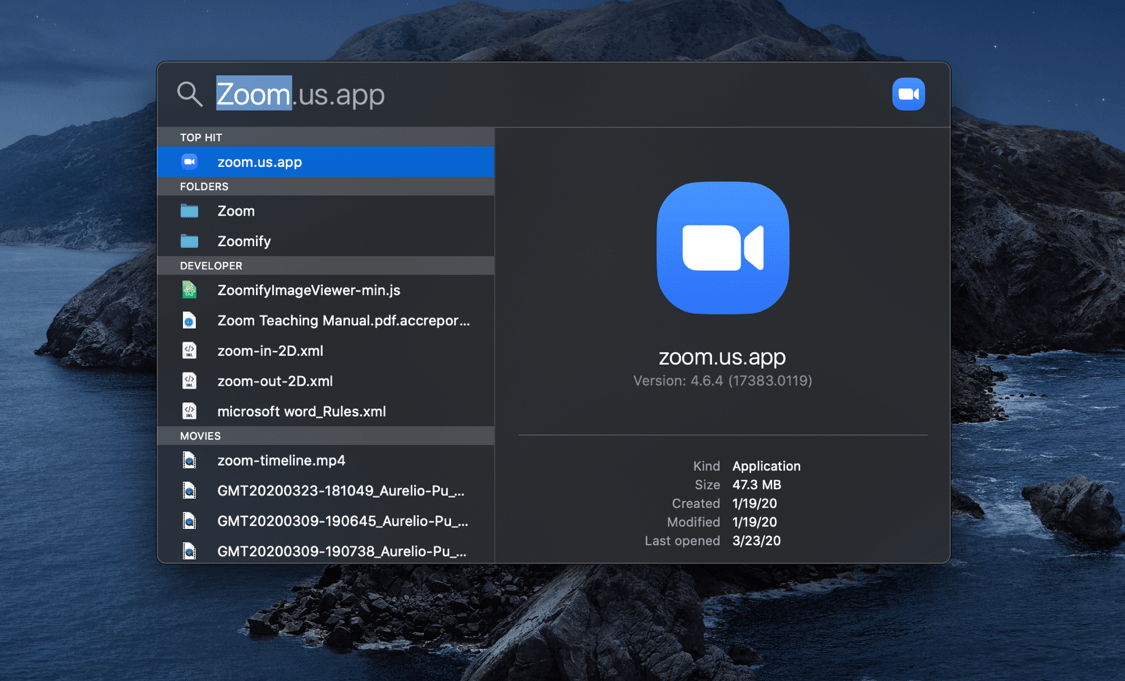
- Type in your @cmc.edu email address and the password you set for your Zoom account and click on “Sign In”.

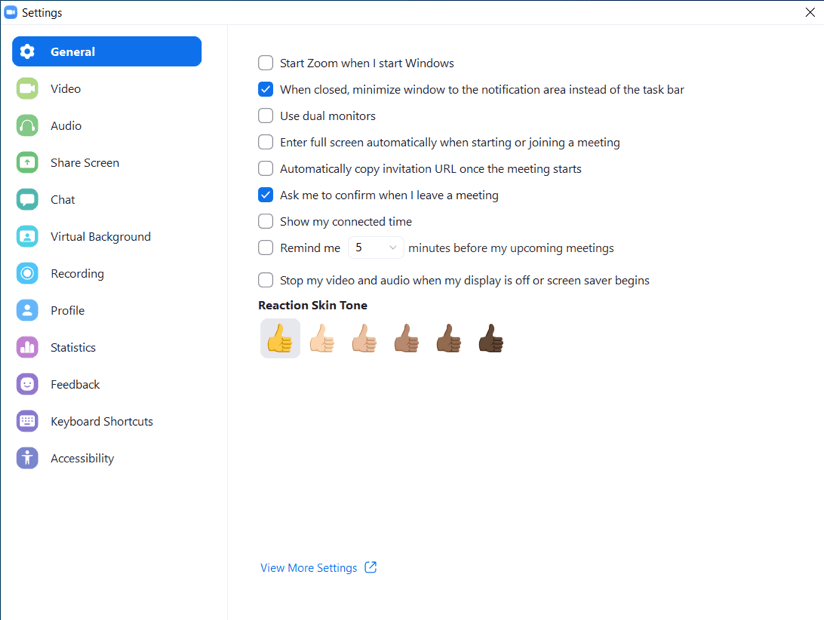
- Once you’re signed in, click on the gear icon under your profile picture or initials. This will open the settings menu.
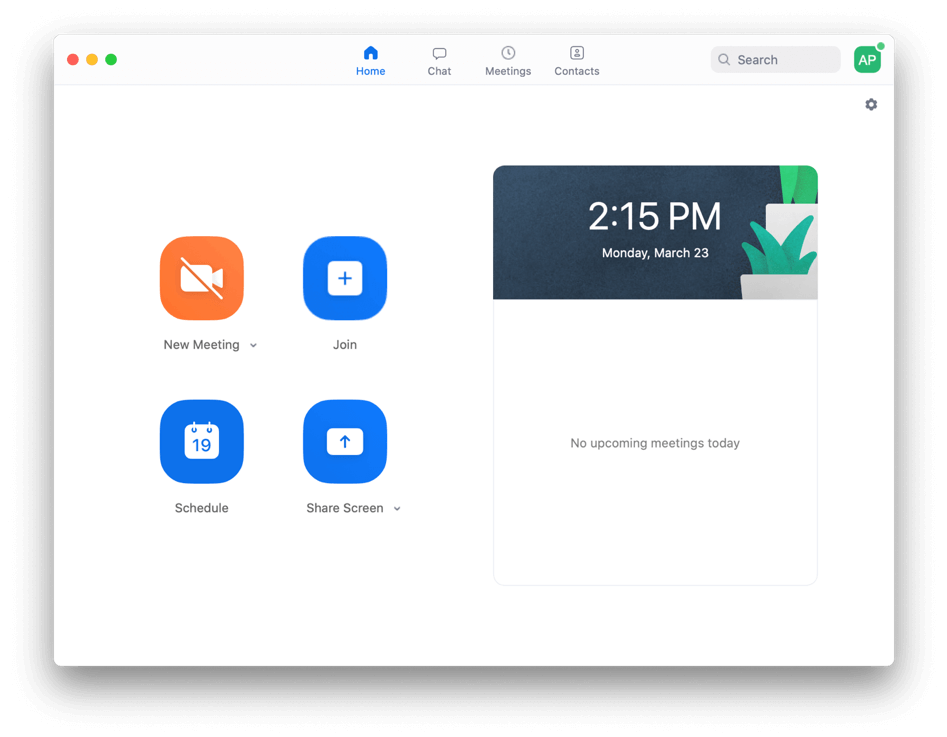
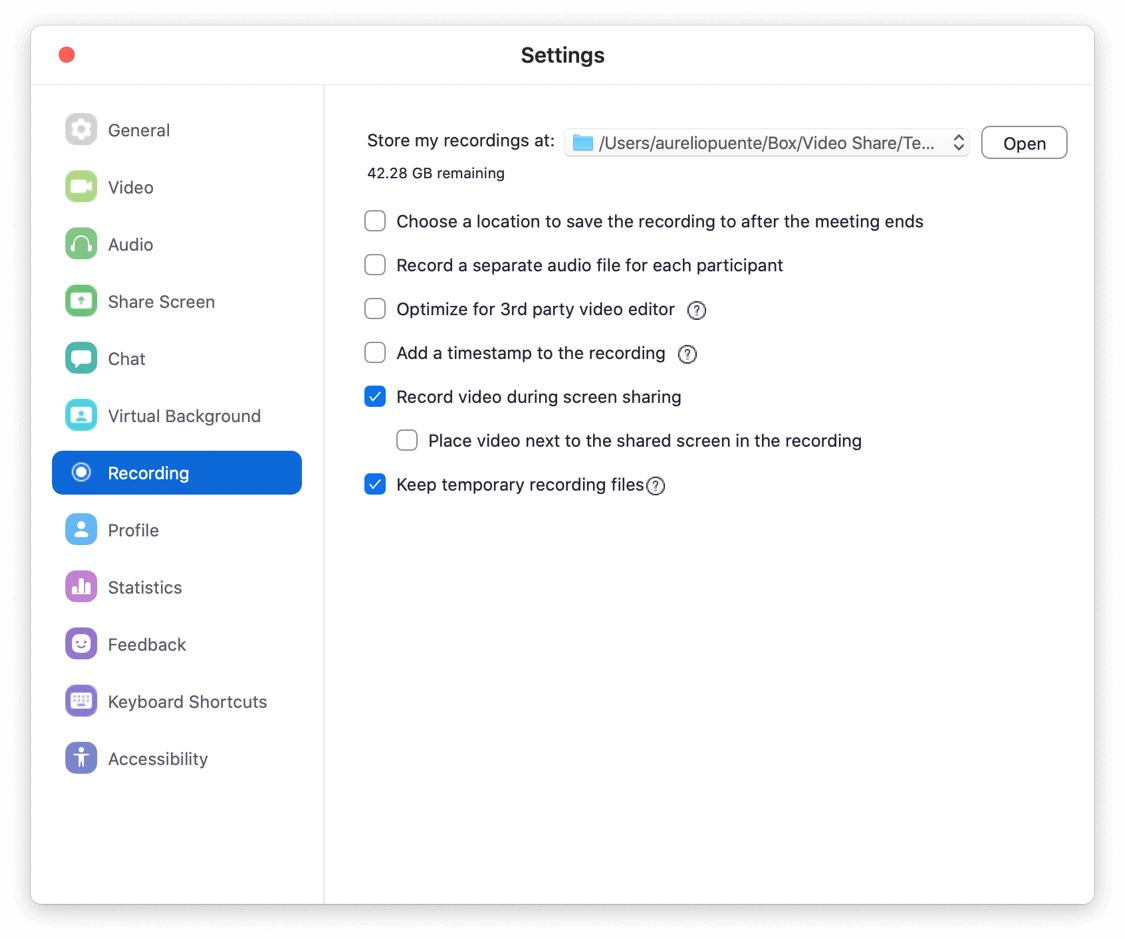
- Click on the “Recording” tab on the left of the “Settings” menu.
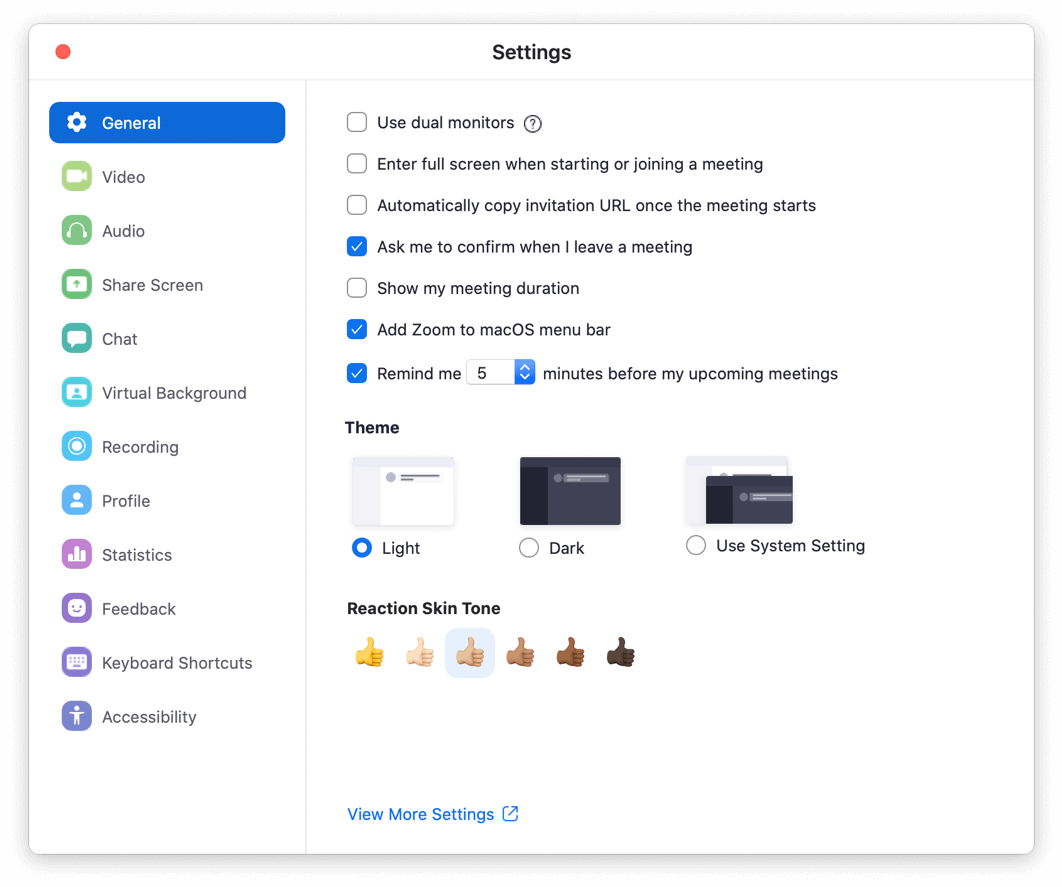
- Make sure “Keep temporary recording files” is checked. This can be helpful if you need to recover an interrupted recording.

- (Optional) click the current path to select a custom directory to store your recordings (e.g. a Box folder).
- On the Finder window that pops out, navigate to your desired folder. Once you are inside your desired folder, select “Choose” to set your destination.
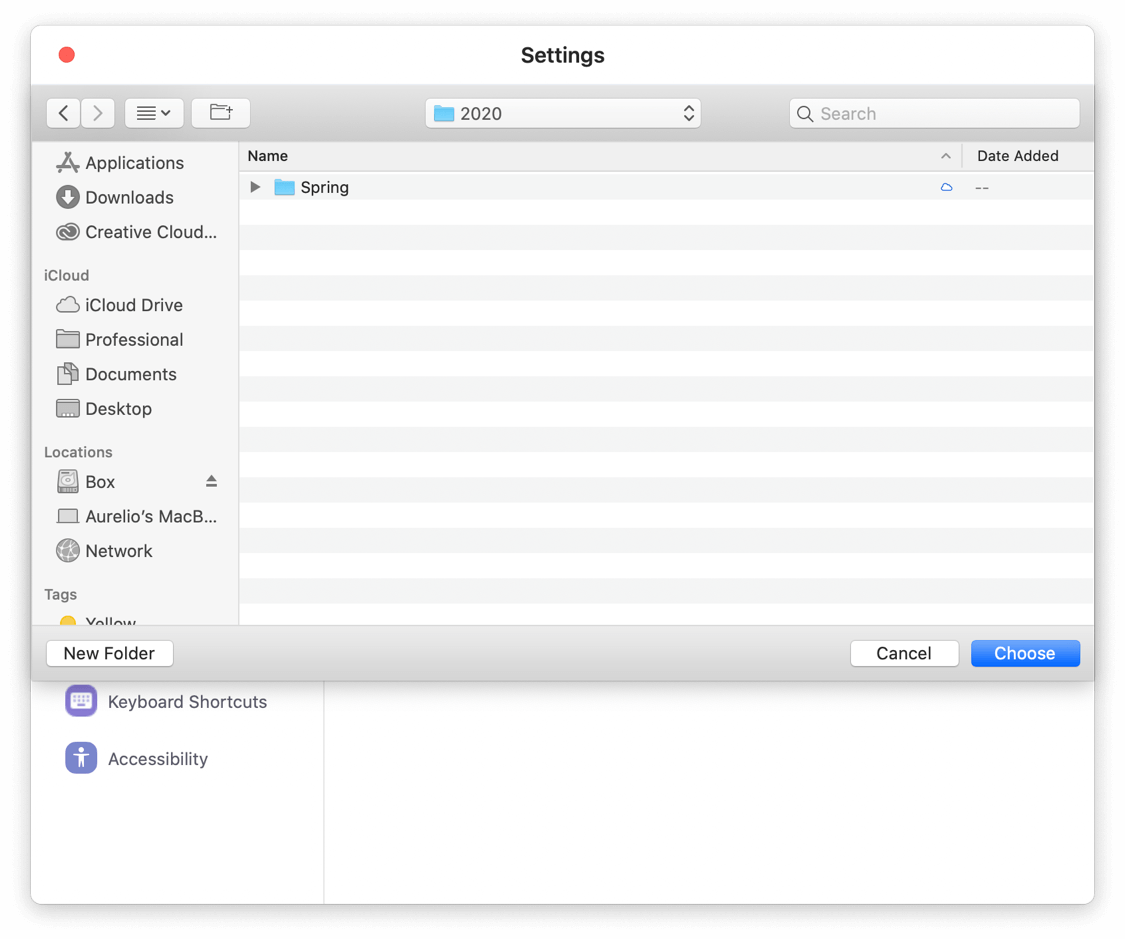
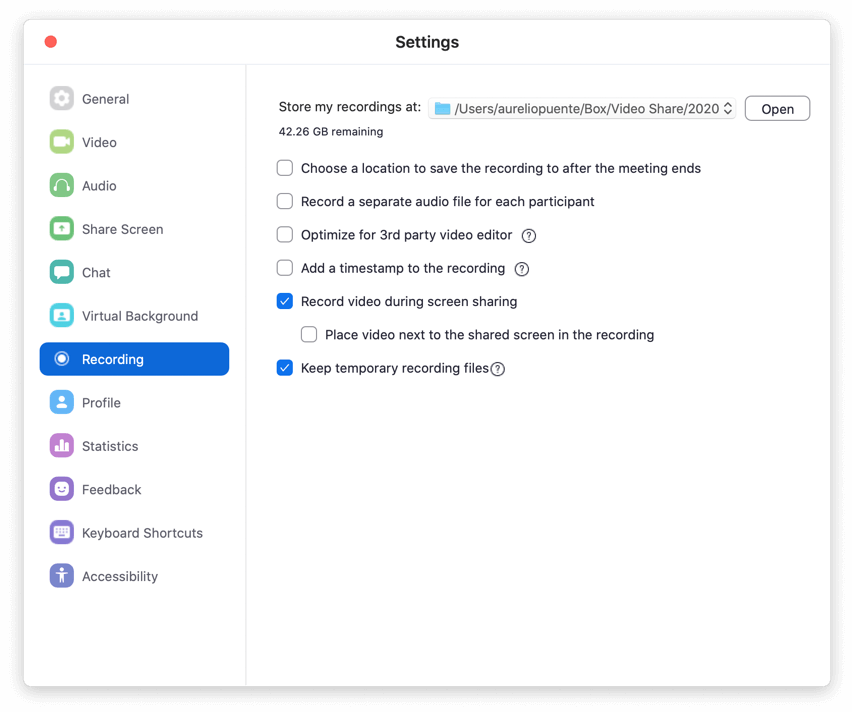
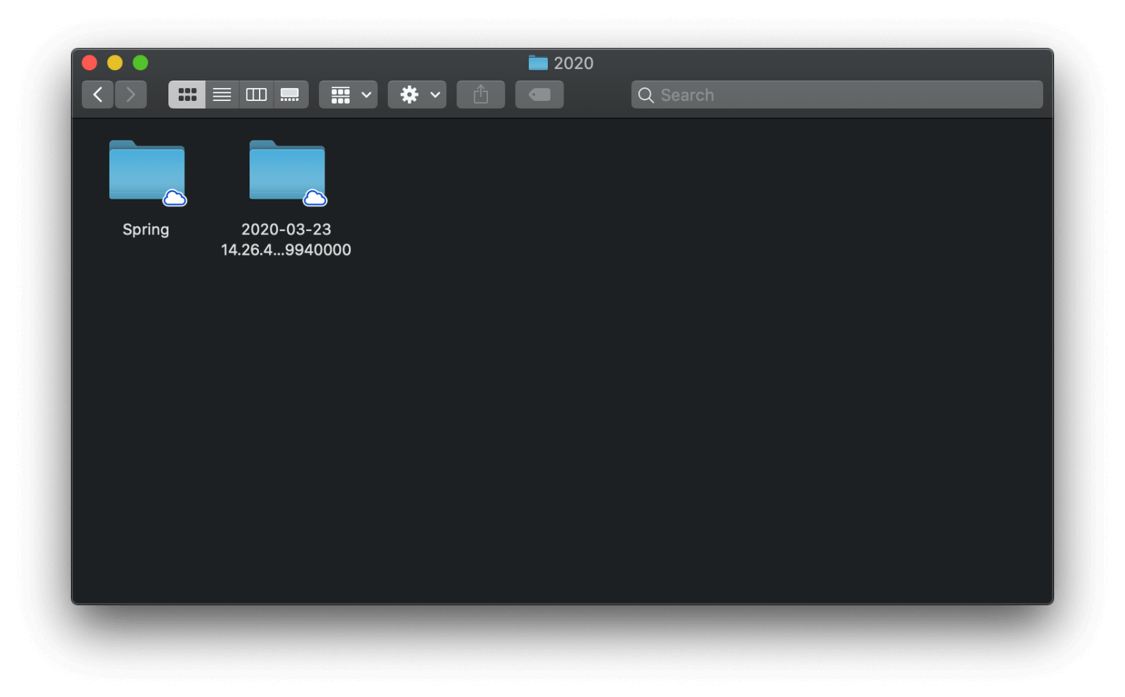
In the above example it is a folder I created on Box called “2020”. It is mapped using Box Drive.
- The new folder you selected should be reflected in the “Store my recordings at:” field as shown below.
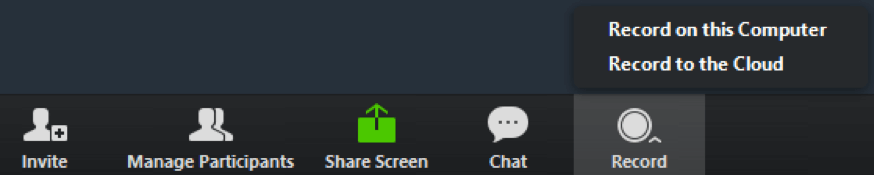
- Once in your meeting, to start the local recording click the “Record” button on your host taskbar.
- If a menu appears, select “Record on this Computer” this will record to your selected local recording folder.

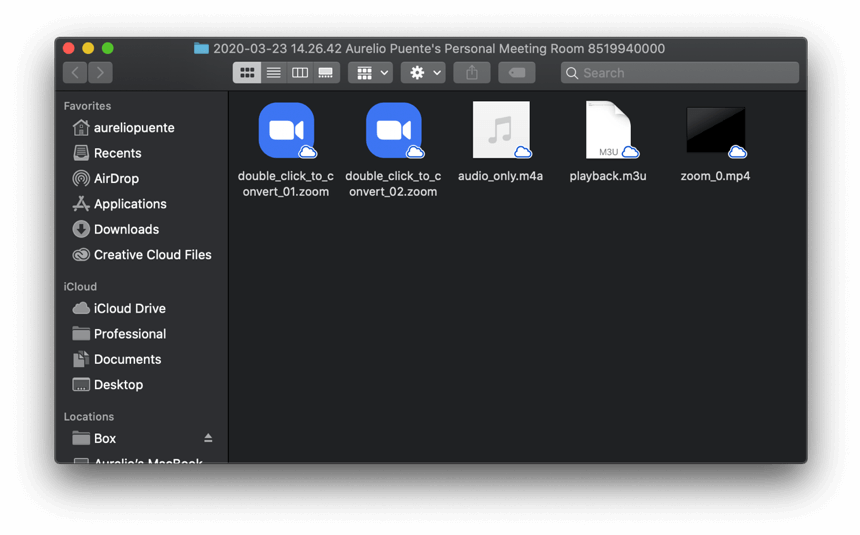
- If everything is correct, you should notice a folder appear in your selected “Local Recording” folder.
This folder will contain .Zoom temporary files after starting recording as well as M4A audio files and MP4 video files after your recording is converted.
Configuring and using local recording on your Zoom account on Windows 10
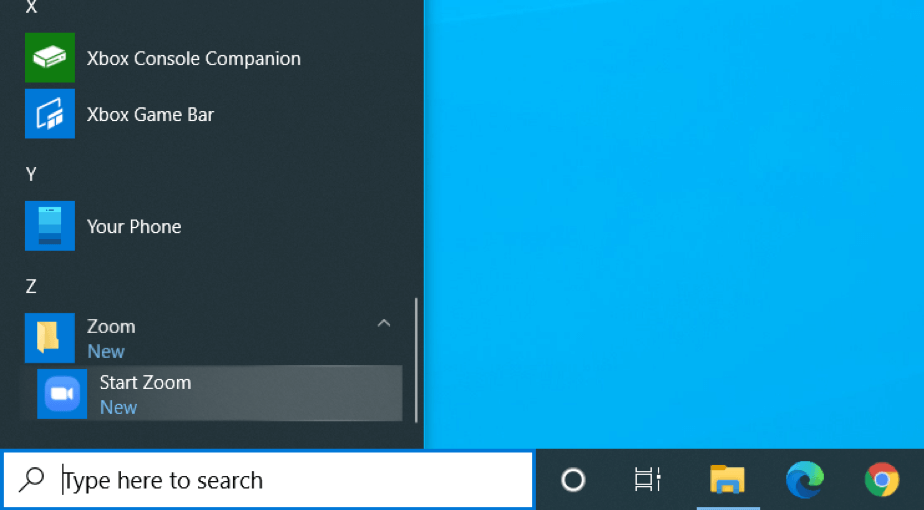
- Launch the Zoom desktop client by either clicking on “Start Zoom” under the Zoom directory in your programs menu.
- Type in your @cmc.edu email address and the password you set for your Zoom account and click on “Sign In”.
- Once you’re signed in, click on the gear icon under your profile picture or initials. This will open the settings menu.
- Click on the “Recording” tab on the left of the “Settings” menu.
- Make sure “Keep temporary recording files” is checked. This can be helpful if you need to recover an interrupted recording.
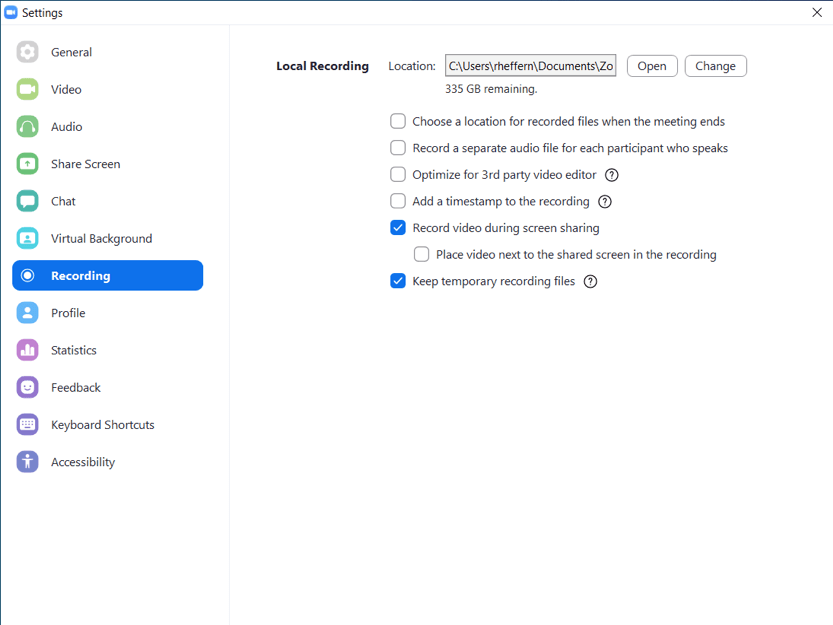
- (Optional) click “Change” to select a custom directory to store your recordings (e.g. a Box folder).

- On the “Browse For Folder” pop-up menu, scroll to your desired folder, click it to highlight it and click “OK” to save this setting.
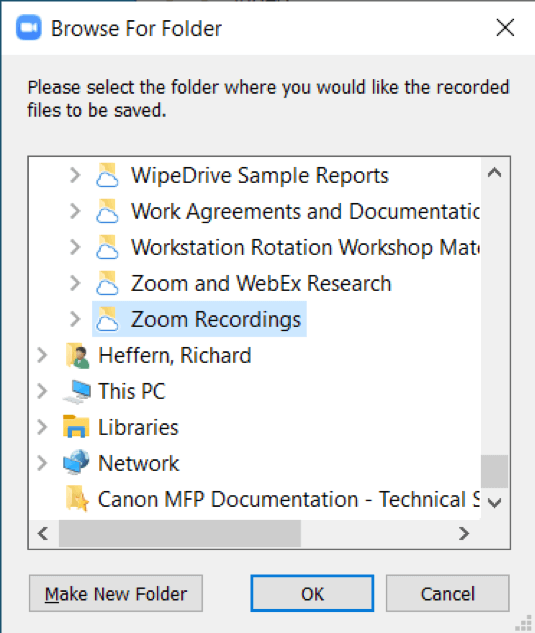
In the above example it is a folder I created on Box called “Zoom Recordings”. It is mapped using Box Drive.
- The new folder you selected should be reflected in the “Location” field as shown below.

- Once in your meeting, to start the local recording click the “Record” button on your host taskbar.

- If everything is correct, you should notice a folder appear in your selected “Local Recording” folder.
- If everything is correct, you should notice a folder appear in your selected “Local Recording” folder.
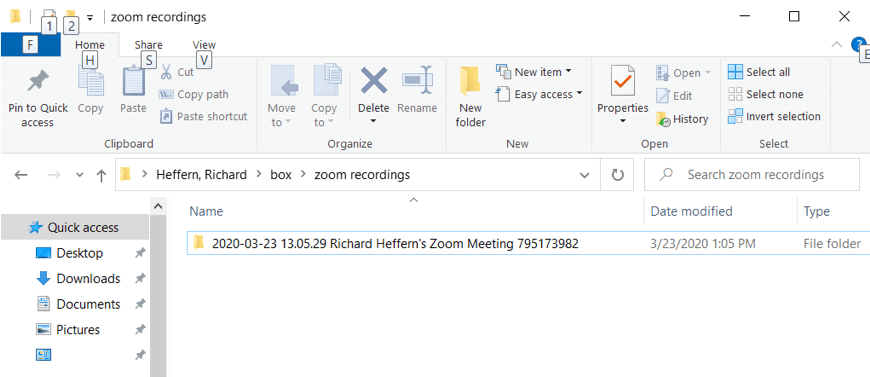
This folder will contain .Zoom temporary files after starting recording as well as M4A audio files and MP4 video files after your recording is converted.
How to Record Meetings in Zoom

- Before recording your meeting, check your Recording settings at the zoom.us site so that you can ensure your recording will include any specific options that you may need.
- Once you've updated Recording settings and started your meeting, click Record in the menu to begin recording.
All recordings will be sent to the Zoom cloud once they're finished processing. Your recordings will be available after logging in at the zoom.us site.
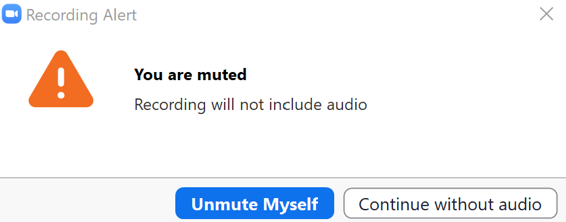

- If your mic is muted, the pop-up (below) will appear. Click ‘Unmute Myself’ to record your meeting with audio.
- After Zoom begins recording, the Record button will be replaced with the Pause and Stop buttons. Paused sections of the recording will be clipped out of the final video.
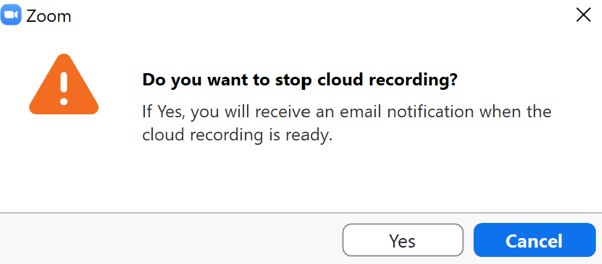
- When you're done recording, click the Stop button. Click ‘Yes’ when the pop-up below appears to stop the recording and save it to the cloud.
Downloading & Sharing Recordings
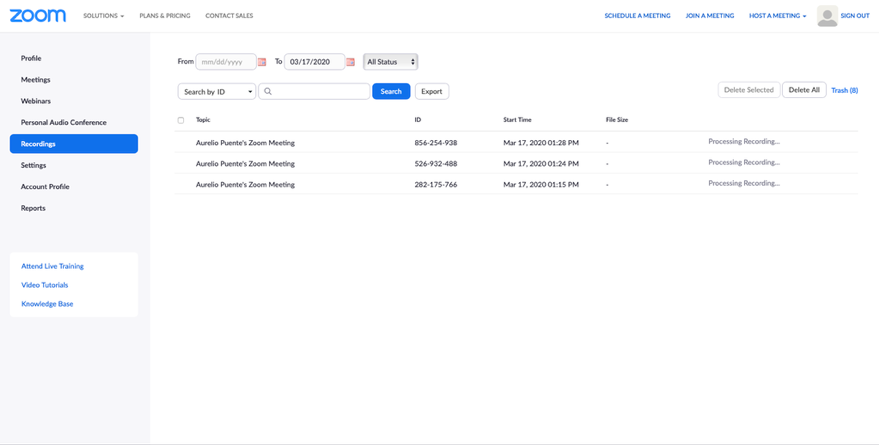
- In the Recordings section of your Zoom account on zoom.us, you can see if your finished recordings have been processed. Processing times may vary depending on your Recording settings and the overall length of the recording. Additionally, heavy usage of the Zoom recording feature worldwide may lengthen processing times.
- Once a recording is processed you can click ‘More’ to download it to your computer and then upload it to Box, or Sakai (for files under 100 MB), where you can easily share it with students.
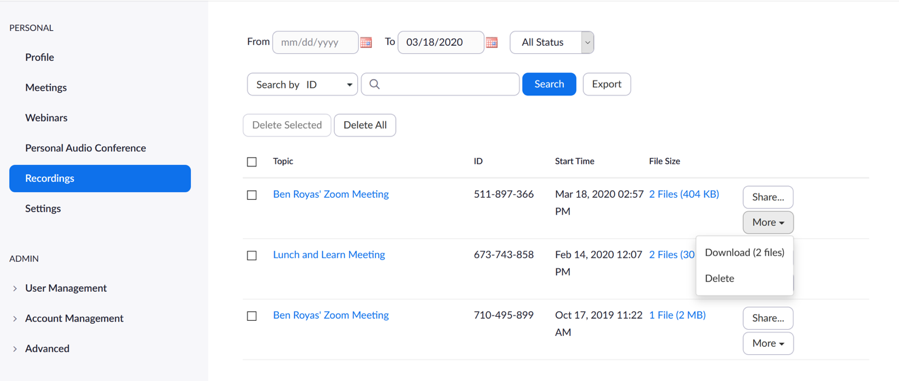
To conserve storage space in your Zoom cloud, please make sure to delete any previously downloaded recordings.
- Additionally, you can share the recording directly from the Zoom cloud. By clicking ‘Share’ you can control the settings and permissions of the shared recording through the panel below. If you’d like to control access to the recording, make sure to enable the “Password protect” setting.
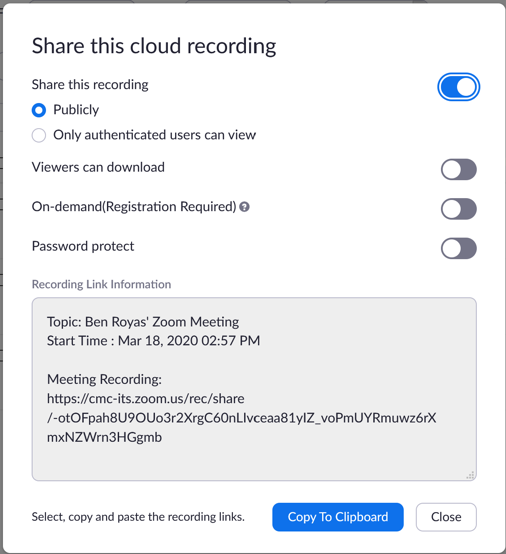
To share the recording, click ‘Copy To Clipboard’ and paste the link into either an email to your students, or a course Announcement on Sakai.
If you record a class meeting and students stick around after class to ask questions, stop the recording before answering the questions and consider using breakout rooms.
As with face-to-face classes, your students will stick around after your Zoom class meetings end to ask you questions. Some of these questions can be deeply personal. You do NOT want to record those. Stop the recording before you take any questions. Also, if there are a lot of students hanging out after class and one of the students needs to talk to you about something private, offer to put that student in a private breakout room and talk to him or her there.
Use In-meeting File Transfer
One of the easiest ways to share files with your students is to use Zoom’s file transfer tool in the chat panel. Students will see a notice that a file has been made available and will be given the option to download it.
Review Zoom’s hidden settings
If you go to the Zoom profile settings, you can see all of Zoom’s hidden settings. Some settings you may want to consider changing are:
- Display end-of-meeting experience feedback survey. Zoom can ask your students to complete an on-screen thumbs up/thumbs down survey at the end of every class. If students give a thumbs down, they can provide additional feedback. The end-of-meeting experience feedback survey is disabled by default.
- Nonverbal feedback. On the participants list, attendees can click an icon to provide feedback to you (things like Raise Hand / Lower Hand, yes, no, go slower.). This is disabled by default. If you enable it, if a student clicks on a feedback icon, you'll see that icon beside their name on the participant’s list. If a student clicks raise hand, you can lower their hand by hovering over their name and clicking Lower Hand. Click clear all to remove all nonverbal feedback icons.
Sharing and Collaborating on Box
Box users have a few options available for sharing files. It is ALWAYS recommended that you create a new folder for shared files in Box, to ensure a separation of private files from the ones you want to share. Any folders and files within the shared folder will have trickle-down permissions depending on the sharing options you select.
Sharing from the file manager
- If you hover over a file or folder in the file manager, the 'Share' button will appear.
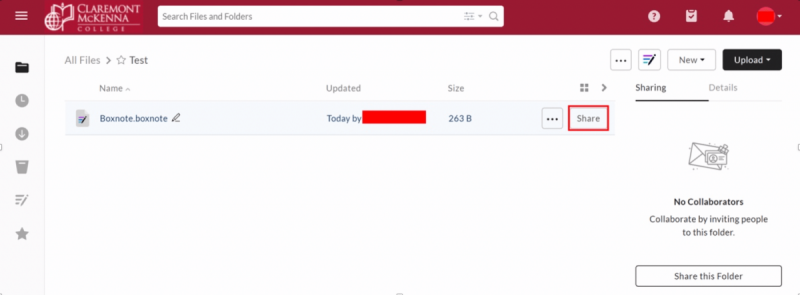
- Clicking 'Share' opens the panel below, where you can invite students with certain permissions, or enable a shareable link which you can set the permissions of and then send to collaborators/students. Clicking on ‘Link Settings’ will give you expanded options to prevent access after a particular date.
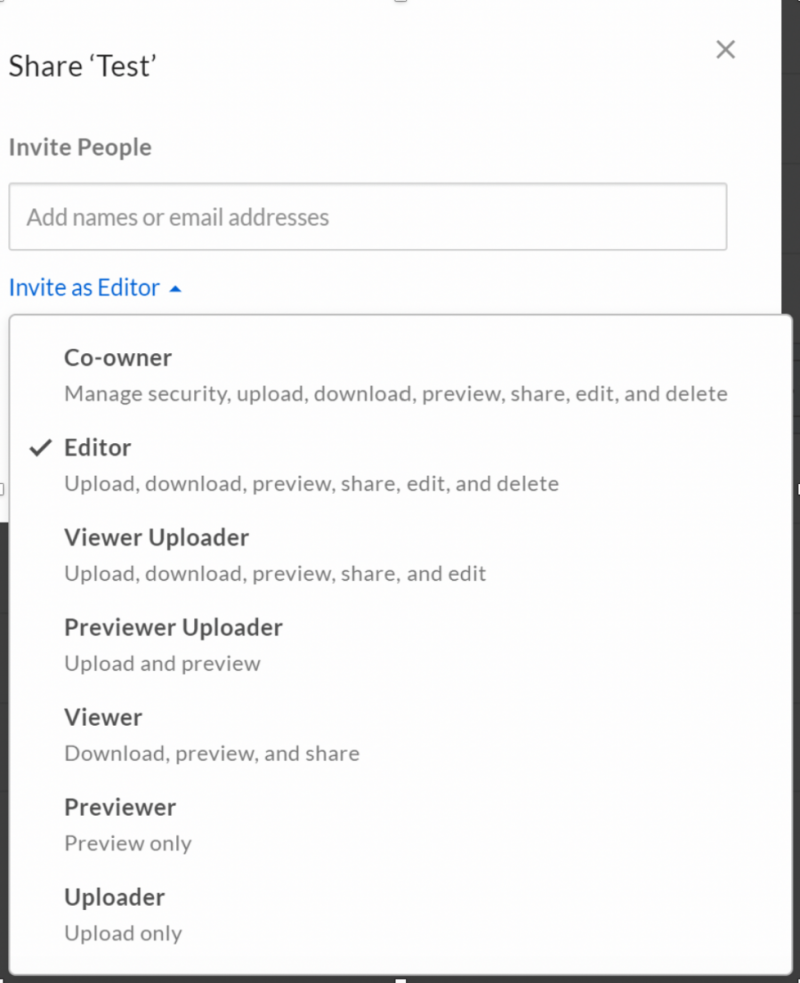
- Clicking ‘Invite as Editor’ will show you the permissions that will be granted to the collaborators you invite. File permissions can either be set to Editor or Viewer, while there are many more folder permission options, as show below.
VERY IMPORTANT: if you are worried that students will download your videos and share them widely, or put them on Youtube, then you must set their permission as ”previewer”—not “viewer,” for the latter include the capacity to download.
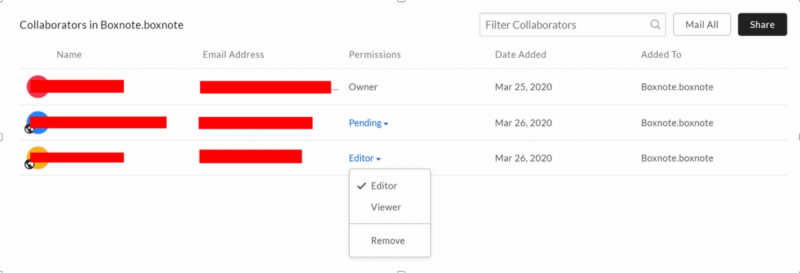
- You can change the permissions of a collaborator by clicking the ‘…’ next to Share, and in the drop-down click ‘More Options’, and then ‘Manage Collaborators’.

- A page will open to the Collaborators page for that file/folder. Here you can see your collaborators, whether they’ve accepted your invite to the file, and what their permissions are. If a collaborator hasn’t accepted, you can always resend the invite.
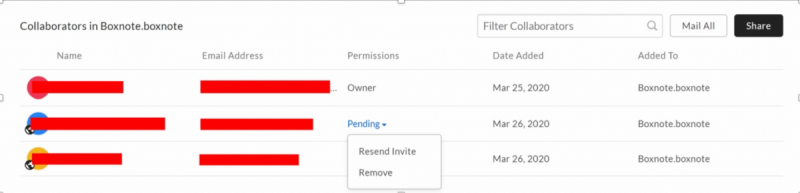
- And if you want to change a collaborator’s permissions, you can do so from here:
Sharing from within a file
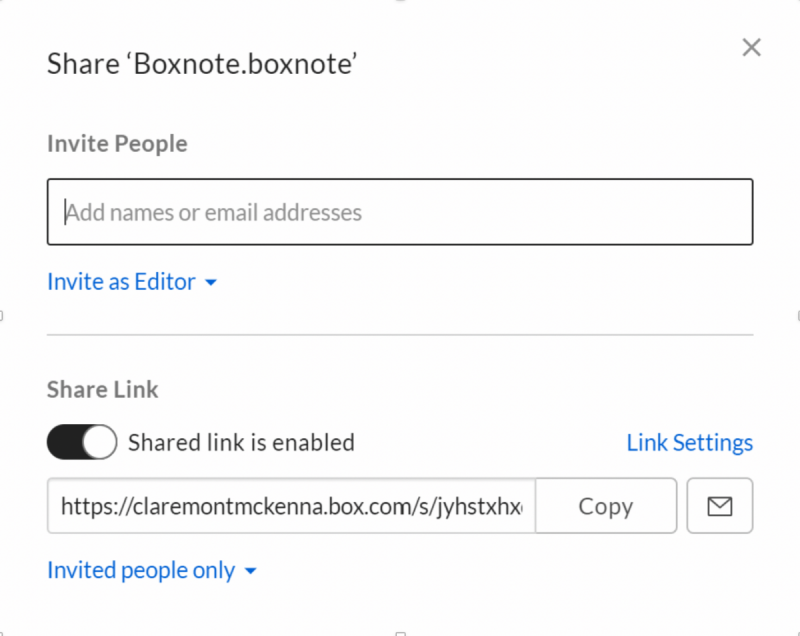
- Within a file, clicking 'Share' in the top-right will give you the options to create a shareable link, invite others, and manage file collaborators. The options given are the same as described above, but can be managed directly from the file in a streamlined fashion.

Know Zoom’s Limitations
Zoom is arguably one of the best web conferencing platforms available. But it was designed more for live, one-off meetings than for recurring classes or lectures. Some of the things that you might want to do in a teaching platform like Sakai you simply won’t be able to do in Zoom.
For example,
- Pre-loading content. If you wish to upload content before a meeting, you can do so using Sakai or Box.
- Assessments. While Zoom has a polling tool, it does not have a testing or exam tool. It is recommended you use Sakai’s test and quizzes tool for online assessments.
- Attendance. Zoom does not have a roster tool and therefore cannot automatically take attendance. There is no workaround.
- File storage. While you can share files using the Chat box, Zoom meetings are not really meant to be file repositories. Tip: If you want to create a file repository for your course, use Sakai or Box.
- Polling. If a poll contains multiple questions, your students must answer all of the questions and then click submit before Zoom will record any of the students' answers. In addition, only single choice or multiple-choice questions are allowed. Tip: for more advanced polling features, use Qualtrics or Poll Everywhere.
- Whiteboard. Zoom’s whiteboard (see Sharing a Whiteboard) is an effective tool for summarizing key points during discussions, but the button students click to download a screenshot of the whiteboard is hidden. While the whiteboard is on the screen, the students have to click the View Options pull-down list at the top of the whiteboard and then click Annotate. Only then will they see a Save button.
Before the Meeting
- Test your Audio and Video
- Lighting should come from in front of you or from the side to best light your face
- Put your webcam at eye level or higher – experiment for best angles
- Schedule some time to test the equipment as well as time to practice in the video conference room before your session
- Make sure that your background is appropriate and not distracting (i.e. cluttered with clothes, books, other personal items, lights, etc.)
- Determine how to structure when students are allowed to talk and share.
- Have a backup plan in case of unexpected issues or difficulties. (i.e. phone conference, using Sakai to facilitate the class, group discussions, or other independent learning activities.). It may be best to inform students of the backup plan ahead of time so they can remain on task if technical issues occur.
- Whenever possible, use an ethernet connected device when presenting. Wireless connections tend to drop unexpectedly and may cause a participant’s screen to freeze and/or distort their voice
In the Meeting
- Explain how you want students to request an opportunity to speak. For example, raise hands or submit a question via the chat box.
- Classroom whiteboards may experience issues with glare. Please check the room ahead of time to ensure the best possible angles and lighting. Other options would be to use the Zoom Whiteboard or the document cameras in the classroom.
- Mute your mic if others are presenting. If you notice distracting audio or feedback during a session, try muting all participants to eliminate the noise. You can then unmute individual students when necessary.
- Use “Gallery View” for smaller group/team meetings.
- Share specific applications to control displayed content and avoid sharing other non-relevant items on your desktop while presenting
- Use “New Share” to seamlessly transition between shared applications.
- Use the Annotation tools to grab and direct attention
- Consider saving any annotations or whiteboard exercises so that they can be shared later or used for reference
After the Meeting
- Share notes of the meeting and all group findings with your participants to reiterate
- Encourage students to access slides and materials and to post questions about the video conference session on Sakai
- Download your Zoom recording and store it on Box or Sakai for review or sharing with students at a later time.
Using Zoom Creatively
- Office Hours: use screen sharing to review with students and give feedback in real time.
- Exam prep: have students use the chat tool or their computer audio to ask questions or clarify concepts before an exam
- Open a Zoom session for student led discussion or instructor led review, and allow students to enter as necessary.
- Breakout Rooms: consider breaking learners into groups during a session. Design group activities around a challenging problem, case, or thought-provoking question connected to specific learning objectives of the course.
- Consider integrating Sakai discussion forums to have groups share in writing what they have come up with.
CMC Faculty Tips for Using Zoom
- If you run into bandwidth constraints, ask students to turn off their video
- Encourage students to download Zoom on their phones (in addition to their computer).
- Be kind to yourself and your students. Everyone is stressed, even if they're playing cool. That includes faculty.
- You will not recreate your classroom, and you cannot hold yourself to that standard. Moving a class to a distance learning model in a week's time excludes the possibility of excellence.
- Make assignments lower or no stakes if you're using a new platform. Get students used to just using the platform. Then you can do something higher stakes. Do not ask students to do a high stakes exam or assignment on a new platform.
- Stay in contact with students, and stay transparent. Radio silence, even if you're working, is not okay.
How do I choose the right technology
If you want to....
1. Hold a real-time, interactive class:
a. Lecture/discussion only (no white board or other visuals) • Technology: Zoom meeting
b. Lecture/discussion with visuals (slides or documents) • Technology: Zoom meeting; sharing your screen (with PowerPoint slides or any document) at appropriate times.
c. Lecture/discussion with whiteboard work • Technology: Zoom meeting, supplemented by streaming whiteboard work through Rocketbook BEACONS. Students can see the whiteboard work more clearly while receiving audio through Zoom. If you have no whiteboard at home, you can use GeckoPadz static “cling on any surface” dry-erasable sheets. Please contact Aithan Peterson to pick these up a set of Beacons and Padz; they will also organize a set of demonstrations during Spring break
• Zoom meeting, using iPad Pro or (much cheaper) Microsoft Surface with writable surface (as an extension) for the whiteboard work. Using the tablet as a secondary “Side Car” monitor on Zoom:
White Board: You can use the whiteboard feature from the Zoom application and use that window on the iPad. This would allow you to retain the full use of your workstation, while using the iPad with an accompanying stylus/pencil and writing on the white board to share content; you can make it full screen, in order to take advantage of the full real-estate of the screen. You should also be able to share accompanying video from your workstation or an external camera. However, the white board cannot be shared simultaneously with another screen share. The whiteboard itself is considered a screen share; therefore, Zoom does not allow this.
It is possible to allow this by joining via the iPad Zoom app, as a non-host user and extending presenter privileges to the iPad.
Dual Monitor: You can enable the “dual display” setting inside the Zoom app on your Workstation and use the iPad, via SideCar, as a secondary monitor. This allows you to pin two different videos to each screen. They are essentially going to act as two zoom windows that allow you to choose videos/screen shares to pin down from other users. You have to move the Zoom Windows between your primary screen and SideCar screen, in order to re-arrange them.
2. Pre-record a class lecture, post for viewing
• Technology: Use the recording function in Zoom or any other camera you have—even the one in your cellphone will do. Share the recording with your students (email or post on Sakai site). If using Zoom, see How to Record Meetings in Zoom.
• Consider supplementing pre-recorded lectures with a discussion periods to answer questions about the lecture they watched or expand on ideas. Zoom meeting works well for this. This is essentially the idea of a flipped class.
3. Hold written class discussions
• Technology: Use the “Chatroom” function on Sakai or the “Chat” function on Zoom. You can add video or visuals in Zoom. These chats are usually asynchronous (although they don’t have to be), which can be easier for students in different time zones.
4. Make other changes to your course
You can then distribute this link by e-mail or through Sakai’s Announcement feature.
• Students send completed writing assignments (article, book, data analyses, other writing prompts, etc.) through email or Sakai.
• For some courses, you could move into a more “independent study” modality, with students doing more self-directed reading, writing papers, and checking in weekly with the instructor through Zoom
• Sakai also has “Wiki” and “Blog” functions that can be used creatively.
Using Rocketbook Beacons During a Lecture
Steps:
- Take the clear plastic backing off your four Rocketbook Beacons (save the plastic to put back on the beacons when you’re done using them).
- Place the beacons in the four corners of your whiteboard. They will not work on blackboards. If you aren’t going to use the entire whiteboard, just put the beacons in some kind of rectangular formation. It doesn’t have to be a perfect rectangle.
- Download the Rocketbook app onto your phone and sign in (you will be creating a new sign-on).
- At the bottom of the screen in the middle, click the “New Scan” icon, which is circle with a plus sign in the center.
- At the bottom of the next screen in the middle, click “Beacons.”
- At the top of the next screen, towards the right, click the pyramid shape that has quotation marks around the top (it’s like a radio tower broadcast symbol but with a pyramid instead of a tower). This is the Snapcast button that will let you stream your board to students.
- A link will appear at the bottom of your screen under “My Snapcast.” Options for sharing the link with your students include:
- Emailing it to them.
- Posting it to Sakai (the link will always be the same for all of your Snapcasts).
- Emailing it to yourself and copying it into the Zoom chat.
- Emailing it to yourself, opening the link in your browser, and sharing your screen on Zoom.
- Now,focus the screen: Hold your phone as though you are taking a picture and trying to get all 4 beacons in the shot. If you can’t get all 4 in the shot right away, you might want to turn your phone horizontal and gradually walk back from the board. When all 4 beacons are in the picture, the beacons will turn into green dots on your screen, and the space between them will look like an orange box. You will also see the message “Scanning-hold still.”
- Prop your phone in this position with the view of the whiteboard. It’s okay if the camera is sitting about table-level and tilted up to view the board. It will take an image of the board every 5 seconds, which will stream to the link you sent to your students.
- Quit out of the app when you are done. The last image will stay up at the link, but the other images in the Snapcast will not be saved. Don’t forget to put the plastic backing on your Beacons and put them away if you don’t want to leave them up on the board.
Some tips for getting the most out of the Beacons:
- Your phone will take an image of the board every 5 seconds, but depending on your students’ internet connection, it could take 10 seconds for the image to reach them, so you might want to pause after writing on the board and talk for a few seconds to give them time to get the image.
- As mentioned above, the images from the Snapcast are not saved (i.e. you won’t get a recording of your Snapcast or a set of images that streamed during your Snapcast), though the last image will stay up at the Snapcast link until you start a new Snapcast. There are a few options for preserving the other whiteboard images that appeared during the Snapcast:
- When your students go to your Snapcast link, there is a download icon that they can press at any time during your lecture to save the whiteboard image that is currently displayed on the Snapcast. Similar to when students take a picture of the board in the classroom, you can pause after you are done with what is on the board and ask, “Did everyone have a chance to save what’s on the board? Okay, I’m going to erase it now.” This puts the responsibility on the students to save the images from the board that they need.
- Alternatively, you can record your Zoom meeting and share the Snapcast on your screen during the meeting: open the Snapcast link in your browser and then click “Share Screen” in Zoom and select your browser window. This will record your Snapcast along with the rest of the meeting. This may be the best option if you have students who are watching the Zoom meeting asynchronously. This way, they can see everything that was written on the board.
- You can also pause and periodically save an image from the board while you are in Snapcast mode. Click the “...” more options icon and then “Share image” at the bottom of the screen. You can choose to send the image to your email, Box,even to your students on Zoom—but you have to create a contact list of all the students in your class on Zoom (a “Channel”) first before you can send it to them as a group. The downside to this approach is that it breaks your flow during the lecture: you have to pick up your phone, take the image and send it somewhere, and then reposition your phone to continue the Snapcast.
- If you want to use pieces of paper instead of a whiteboard, you could put the Beacons on a light-colored table around the piece of paper, and this will work the same as the whiteboard. You can switch out one piece of paper for the next as you lecture. One downside to this approach: you have to find a way to angle your phone so that it captures the paper and the Beacons.
- If you are using whiteboard that is longer or wider than 8ft, put two of the Beacons in each corner of the board to get a good image.
Rocketbook Instructions:
Creating a Rocketbook App Account for Beacons
How to Enter Snapcast Mode
How to Share a Snapcast Mode URL